Our last sale was one of the best we've had to date - pre-loved and factory left-over fabrics and notions flooded out of our little store! When all the customers had left we took a look around and noticed barely a dent was made on what we still have!
HELP! We have got to clear out as much stock as possible before we leave our location at the end of October!
Special for the next sale:
Patterns - FREE!
Zippers- FREE!
Vacuum Bags of 3m lengths of fabric- FREE!
Notions- $2 or less!
Rolls of fabric in the green bins: $2 each, any size
Polyester double-knit: all the optimism of the hippy movement, in easy-care wash-and-wear
Background
Twiggy - swinging girl
Here's a puzzle: what to do with a large garbage-bag full of too-small-to-bother scraps of Early Space-Age textiles. None big enough to be a pocket: they should have been chucked when all the pieces of the A-Line Twiggy dresses - and later, the plaid, Mary Tyler Moore pant suits - had been cut. But they weren't, and here they were, 50 years later, in a black plastic bag between my knees, as I sorted donations at Our Social Fabric. An estate donation - I didn't know we had received it, so there hadn't been a chance to thank the donor, or ask my usual questions: who was she? What did she sew, and for whom?
I had only the clues in the one bag, and I wasn't learning much: she sewed. A lot. She liked colour, texture, plaid. She was fashionable, and - despite the unrestrictive fashions of the time - no doubt usually uncomfortable: nearly every scrap was 100%, non-breathing, abrasive-textured, double-knit polyester. She must have been perpetually chafed and sweaty. But she looked good. If not a little pilly.
Mary Tyler Moore - working girl
I wondered: was she on the bus? Did she work? Did she love the Beatles? And why did she save those scraps? What was it about the pieces - too useless, even, for the OSF Free Bin - that caused her to keep them all, and for so long? Too small for garments, not absorbent enough for rags. Not for patches... polyester doesn't wear out. What was she expecting to do with them? I took them home to see if they could tell me their purpose. If not, I would have to throw them out.
It seemed wrong to chuck such hopeful fabric, when it had waited so long: hopeful colours, hopeful patterns, hope for equality, for love, peace and change. Hope for the future. With all that hope, could the pieces really be so hopeless? But there is nothing at all useful about a massive bagful of dinky, ugly, non-absorbent, abrasive, polyester off-cuts... except maybe to piece together like some wash-and-wear, perma-press, crazy quilt. Or something more useful... like a housedress... Or an apron... Or a pop-over! Well! What else could I do?
The back - what a load of scraps!
No scrap was altered in the making of this utilitarian, pull-over pinafore. What you see is exactly what I found in the bag: strange, jagged cuts; long, narrow strips; tapering slivers of psychedelic colours - the negative shapes that remained from making all those fabulous outfits. Three days' sifting produced the right interlocking pieces to accommodate the curved edge of the neckline, armholes and hem. Good thing I like puzzles.
Grain, the Music and Being on the Bus
But wait: there's more! The hang of a garment depends (almost) entirely upon the grain of the fabric, which, in the case of double-knit polyester, should run perpendicular to the floor. This made for tricky scraps placement. Not only did they need to conform to the outline of the pattern, but each piece had to be on grain to prevent wobble and twist. Luckily, there were lots to choose from, and I had Jake Bugg to keep me company!
Jake Bugg
Jake Bugg: the young English singer who caused me to realize we may not be going to Hell in a hand basket, after all. What a relief.
Instead, we are riding the same wave of hope the Beatles rode with everybody else who was on the bus - the Beatles so far in front they seemed to be pulling the wave. They channelled the zeitgeist of the time, providing a sound track to social change that was rooted in hope. That wave crashed, but now is cresting again, and with the aid of information technology it's many times more powerful. Artists like Jake Bugg and movements like Our Social Fabric are riding along with it. These are very hopeful times; we might just yet clean up the mess we're in.
Who is Jake Bugg? He is not his influences: the Beatles, the Everly's, Don McLean, Johnny Cash, Donovan, Neil Young or Hendrix. He is not Dylan, though I see the comparison. But he is special like them. He intrigues me for his honesty, modesty, sharp commentary on his own experiences, and his indifference to public opinion. Like the Beatles, the important thing is the music.
Read the Rolling Stone review of Jake Bugg's first album
Listen to a song: Broken (start at 53sec)
The design was done the usual way, by altering a flat-drafted pattern on a mannequin until it looked just right. However, the sewing is unconventional. There are none of the usual seams. The scraps fit together to form the 3-D shape, sewn edge to edge, without seam allowances. A whole lot of Solvy and diagonal basting* was employed in the construction, as well as some old, abandoned rick rack, which provides the bust shaping and delineates the neckline and armholes. For sewing nerd details, click here. *You might be wondering: what is diagonal basting? It's a revelation, that's what: the best stitch ever for holding pieces exactly where you want them, prior to machining. It is also quick, and uniquely satisfying.
Pocket and Button
"Buttonhole test" pocket
The hip pocket is made of a buttonhole test, found with the scraps. (What did she save that for?!) The cheap-ola, plastic button - original dingy thread intact - came from a garment discarded decades ago. A new shank was created with special thread from a flight attendant - a friend of a friend - who flew in the days when stewardesses were required to be trained nurses and wore high heels and pillbox hats. On layovers she bought sewing goodies: silk buttonhole thread - lustrous and delightful for hand sewing. Some of the tiny spools are now mine.
Sewing the button on this top caused me to ponder two ways to sew on buttons. One results in a tiny, recurrent thrill, and utilises a toothpick. The other is nifty and quick. Which one did I use?
Spot the two fabrics not from the scrap bag. Hint: Cygnet and Authorship
Note to Jake
Thanks for reviving my optimism and for helping me finish this puzzle. More music please! I'll keep checking to see what you come up with next.
Curlicue from my ex-neighbour's front steps railing
You'd think it would be hard to remain dignified while being escorted from one's home wearing a too-large, hooded, Tyvec onesie, duct-taped at the wrists and ankles, like a walking bio hazard - but my neighbour managed it.
...
She lived that way, it would seem, long before I arrived next door. Her shredded, water-stained curtains never parted; the shapes pushing them up against the windows did not change; and a cold waft of fusty air whacked me upside the head if ever I (rarely) knocked on her door: but it was only in the last few years that the extent of her situation became obvious to me. By then, proceedings had already begun to make her a ward of the province, have her hospitalized, and sell her house.
The place was a disaster, but in some ways a little cheering, too. The grass - which she cut herself, shoving and pulling that seemingly over-sized mower through the underbrush - was filled with bluebell and lily-of-the-valley. The back yard was a jumble of over-grown shrubs; an encroaching fig tree; treacherous, abandoned fence-post holes; a towering, out-of-place - but happy - Douglas fir; slugs; and - survey says - rodents (though I can't say I've noticed a decline since the house and garden were removed). OK, maybe the garden was not so cheering, but she planted it all herself in the more-than-40 years she lived there. That counts for something.
The topic of our odd, but beloved, neighbour came up frequently in the alley; we were vaguely concerned about her, but we let her do her thing. She mostly kept to herself, feigning invisibility unless someone spoke to her first, or she was faced with some task too big for her: break her into her house, or help with a flood and fire in her basement. If we met round the end of the fence she was warily generous, offering excellent, though bruised, Gravenstein windfalls that careened to earth from her never-pruned apple tree; tomato starts, discovered in her composter; Sweet William seeds in sealed, hand-labelled envelopes (no luck in my shady garden); and a miniature cup and saucer set for my daughter. Her comings and goings were announced by the sound of her gate, scraping along the ground between our houses, and, every night before garbage day, by the rattle and clink of the neighbourhood's empties, squeezing through it.
She participated in our annual garbage clean-ups, took canning classes at the community centre, and worked all the voting stations, film festivals, and Folk Fest. No doubt you've seen her around. She was engaged in her own timorous, slightly-crusty way, and she was fond of my kids. She was OK by me.
Hand-me-down hostas, sword fern and clematis; tidy, new neighbours, no trees. Did she know I relied on her to remind me of garbage day?
After her release from hospital, she was moved into a condo across town. I am told someone checks on her to make sure she is not accumulating stuff. I saw her last, very briefly, at an Our Social Fabric sale, about two years ago. When I said hello she stopped not looking at me, and made an acknowledgement. Just like when we used to be neighbours.
I've been thinking: now that the shade is gone from my garden, I might buy some Sweet William seeds and see if they'll grow.
Now that the jet-lag is over (more about 10 days in Tokyo with my 12 year-old son later), there are three things on my mind.
Thing One: finish the Humatrope Collar (I think that's what it calls itself)
This is the very most pressing, yet the most impossible of the projects. What's stopping me? A lesson with Blossom, which I can't manage, time-wise, until August, without the help of a whole village.
Still not sure what to do with these bits...
At Blossom's I will learn to make cords to lace up the back of the strictly couture-method, boned, embroidered, beaded corset I've been working on since the fall. It's been a fascinating labour of love, but I admit to being relieved that the end is in sight. A few more hours of beading (an excellent activity for waiting through parkour lessons), make the ties, then insert the lining, make the hand-worked eyelets (using a porcupine quill, no less!), make and attach two beaded tassels, and ta-da! Finished! Blossom says make the garment and the appropriate occasion to wear it will present itself. Maybe; I am happy enough just to make it - I'll learn anything Blossom wants me to know.
I will later apply these principles to make the closure of the collar. I envision two exquisite, beaded, be-tasselled ties hanging down the back, attached to the garment with buttons. This might be where the lavender and light green protective needle caps come in...
Butterfly buttons found in two different boxes of OSF donations. Thank you for saving these for me
The gorgeous, glass and metal, butterfly-entrapped buttons were acquired from two separate boxes of donations at Our Social Fabric. I didn't notice I had a pair until an intense sorting of my button boxes after my son left for military boarding school, and I turned his bedroom into a (temporary) sewing room. I learned to transform, with swift efficiency, a den of Lego, Nerf guns, and items needed to modify them, into a functional, airy, organized sewing room, complete with cutting table, ironing board, room for my serger, and a cork board. And vice versa. In the 10 months he was gone I made that transformation 4 times.
Now I sew in the dining room. Or should I say, we occasionally eat in the sewing room. I gave away the dining room table, painted the bee balm red walls a creamy white (thanks, Erika for the paint), and put the dishes in the basement. My curtains are a dark pink, bobbled, early 70s, off-grain travesty. I have a hand-me-down clothes rack and piles of projects to be sewn. My sewing room is awesome.
So, no Humatrope collar for a month or two, but in the interim, there is
Thing Two: make a Perfect Nightie for my daughter
My daughter likes to twirl, wearing a long, full, swirly nightgown. Who doesn't? I think most people enjoyed it at some point in their lives, and I have a theory that the sexes will never be equal until we are all free to twirl, whenever, wearing whatever comfortable, swirly garment we choose.
Manly, yes, but I like it, too!
The best garment for twirling, according to my daughter, has the following characteristics:
it has a full, long skirt, almost to the floor. A skirt that grazes the floor is the best, but for going upstairs, ankle-length is safer, even if you always remember to hold the skirt up with one hand and hold on to the banister with the other;
it has long sleeves, with elastic at the wrist to keep them from creeping up while sleeping;
there are no buttons, but there are ribbons, bows, cheetah print fleece fabric and definitely some dog-ish element.
It will be a delight to create this dream-come-true for my daughter from the length of cotton, tie-dyed by her at Dunbar Summer Day Camp* last year. The hardest part will be figuring out how to make boxer dog pockets from cheetah print fleece... *the best place in town for supported day camp, in my opinion
Components for Twirling Nightie Perfection
Thing Three is a real distraction. It is jumping up and down in front of me, waving its arms and shouting, "Yoohoo! Oh, yoohoo Mr. Kotter! Pick me! Pick me!" It's my garden, in need of attention, a good tidying up and a whole lot of loving. Or, more accurately, I need it.
Hand-me-down garden
I have in mind a series of photos and short pieces about the various plants that have made their way to my garden (doesn't that sound exciting). A few of the plants were purchased, but most are orphans, abandoned, like most things I'm attracted to. Some came from seed collected in the neighbourhood on long walks, pushing a stroller, desperately attempting to lull a frantic, crying baby to sleep. This is when my love of gardening really began. I started noticing flowers and plants that had never registered before: euphorbia, hellebore, grape hyacinth and snowdrops preceding rhododendrons, preceding the crazy, huge, blue mophead hydrangeas that blew my mind when I moved to Vancouver in 1985 to attend UBC.
It was August when I came, just in time for a week or two of fun before school (and the rain) began. The audacity of the massive blue flowers stunned and delighted me. I knew I was home.
Sometime during my determined, distressed march through the seasons, I started noticing stirrings of plant lust within me. I began looking for my favourites in yards and alleys along my many routes. I anticipated their blooms*. As I trudged along, glassy eyed, trying to tune out the crying that only enough time in the stroller (or sometimes, the car) could relieve, I planned where I might put them in my own garden, if I should ever take my hands off the buggy long enough to pick up a shovel. *The highlight was the smell of the daphne odorata in February. I hovered so long and so often outside the fence of a particular house, deep-breathing to the point of dizziness the crisp, lemon-lilac-lavender scent that reminded me of a wonderful friend I left in Japan, that the owner came out to check me out. I finally bought two of my own, and planted them in containers, anticipating a probable move that still hasn't happened. One of the daphne bloomed its last this spring. Alas
A tiny twig chair, found in a pile of trash behind a church near Trimble Park, slowly returns to the earth.
Almost all of my plants have a story, or a memory associated with them, happy or sad. My garden has a personality. I visit it, like I would a friend, miss it when I can't. We chat. It tells me what it needs, and I try to listen. It responds to me when I do, leaving me little surprises, as delightful as love notes or miniature salt and pepper shakers my mother tucked into my lunch bag when I was a kid. When I make a mistake, it lets me know, then usually forgives me. It makes me feel like a capable and competent person, and it gives me hope and confidence when motherhood seems like a futile, incomprehensible, surreal undertaking I'm sure I didn't sign up for. I take care of my garden, so I can take care of my family.
So I think what I'll do in my spare time* is hang out in the garden, writing. And on any rainy day until Blossom's lesson I will sew part of a perfect, swirly nightgown. I'm going to have so much fun! *i.e. instead of doing unnecessary housework. Thank you, Mother-in-Law, for your advice years ago: nobody ever went to her grave wishing she'd done more housework
Most people do as little hand sewing as possible, thinking it is not fun, or it's hard. I can't help with the fun part (though I do enjoy it, myself, in moderation), but there is a simple fact that, if understood, makes it so much easier.
All sewing is all about the grain. Thread has grain. When hand-sewing, the direction the thread is sewn should be the same as it came off the spool. Some folks recommend immediately knotting the thread at the cut end, even before threading the needle, just to be sure to get the direction right. Ignoring the grain results in thread that will knot easily, making hand sewing seem much harder than it needs to be. And not fun.
If you want to use a double strand, do not simply put one strand on the needle and knot the two ends of it together. The difference in the grains will make the threads fight with each other, and it will be a tangly bugger to sew with. Instead, cut two strands, lay them together in the same direction, thread them both through the same needle (tricky, but can be done), knot them together at the end, and sew away.
Speaking of hand sewing, I have read many places that the only proper way to do it is to wax the thread beforehand. I asked Blossom about this, since I've never seen her wax her thread, and she replied that thread these days is strong enough without waxing. Followed by that little "tsk" she sometimes does. So there it is. Couture sewing might be considered by some to be synonymous with doing everything the hard way, but not harder than necessary. I suspect those articles are written by folk who secretly don't wax their thread, either, even if they do sew with the grain.
Tonight is the night I've been waiting for: after four months spent gathering materials, I will finally begin the fun part of my Prader-Willi Syndrome sewing project.* Tonight I begin to play. This is going to be so much fun! *Never heard of Prader-Willi Syndrome? Neither had I
The materials are the waste from my daughter's nightly Humatrope* injections - white, felt-like alcohol swabs and lovely lavender or aqua syringe caps, one per day. I did my usual thing for those four months: I sewed, and volunteered for Our Social Fabric. Some of the debris from these activities was saved, too: all the snipped-off thread tails from the sewing room garbage can and all the plastic pearls found in the dust pan at OSF. I'm curious to see what all this garbage turns out to be. *There are no medications that work to curb the never-ending feeling of hunger that is the hallmark of PWS, however Human Growth Hormone can greatly improve the quality of life. Born with naturally flabby, flaccid bodies, HGH turns fat cells into muscle, lethargic kids into healthier, stronger, more active ones. As a byproduct, more calories are burned, and the child - whose calorie intake is severely restricted by a bizarrely slow metabolism - can eat more food. Almost like a typical kid
For a rough idea of how many would be needed, the swabs were pinned to the mannequin as they became available. The diamond pattern is not quite doing it for me...
The plan is vague: some kind of quilted, layered collar, possibly beaded. A temporary foundation of plastic-like Heat-Away Solvy will provide structure until the thing can stand on its own. The Solvy will eventually be removed by heating. Though it is easier to manage the sturdier sort of stabilizer that rinses out when wet, I don't want to out, out any damn'd spots by accident. I've been so eager to get to the construction, the accompanying article is already finished. I hope to post updates as the project goes along - which I hope is steadily - though that's doubtful, free time being at a minimum. The next step: deciding the best way to assemble it, which will, in turn, affect the design. I'll need to make a swatch, to test if what I'm hoping to do will work. The plan is to use a darning foot to machine-embroider the swabs and threads with Words of Love and Admiration that will hold them all together. One anticipated challenge: the Solvy is delicate and crumbly and will probably tear under the herky-jerky motions of the darning foot. In that case, freehand embroidery won't work and I'll have to go with classic diamond quilting. Straight lines shouldn't be too tricky.
The "ink" for writing the words of love
Thread colour? Don't know. Understated white? Classy, but not really me. More likely, whatever colour there happens to be in any bobbin that no longer has its matching spool of thread. I'm constantly looking for excuses to empty bobbins... How it will fasten is unknown. I had planned to use a real Chanel button found by my son on the floor of the electronics section at a Costco, but he told me recently it's disgusting to put that beautifulbutton on something made out of bloody alcohol pads. He wants me to save it, instead, for a companion piece inspired by 25 Cogmed sessions and the Dubble Bubble* that got him through it. He's right, of course... Never mind; plenty of time to give thought to the closure while I'm testing the sewing technique. *Did you know there are 20 calories in one piece of Dubble Bubble? If I had a tail, I'd be wagging it. Tomorrow I sew!
We give up! Or should I say, we give away! This sale we are concentrating on moving dead stock. We have many bolts of several types of free fabric to be had (Sorry...no photo), as well as rolls of ribbing in many bright colours, and rolls of waistband facing, all FREE. Take it away! Plus, cheap serger thread, deeply discounted bolts of fabric, bundles of lovely wool knit, and sample books. PLUS WHICH! There have been two sizable donations since the last sale, so you will be sure to find something useful.
FREE! Not just for waistbands - we challenge you to find a use for this cool stuff! Look for Carol's purse, on the wall near the cutting table, for inspiration.
Find this lovely, soft velour and high-quality wicking sportswear on the wooden racks- $5-$30/bolt
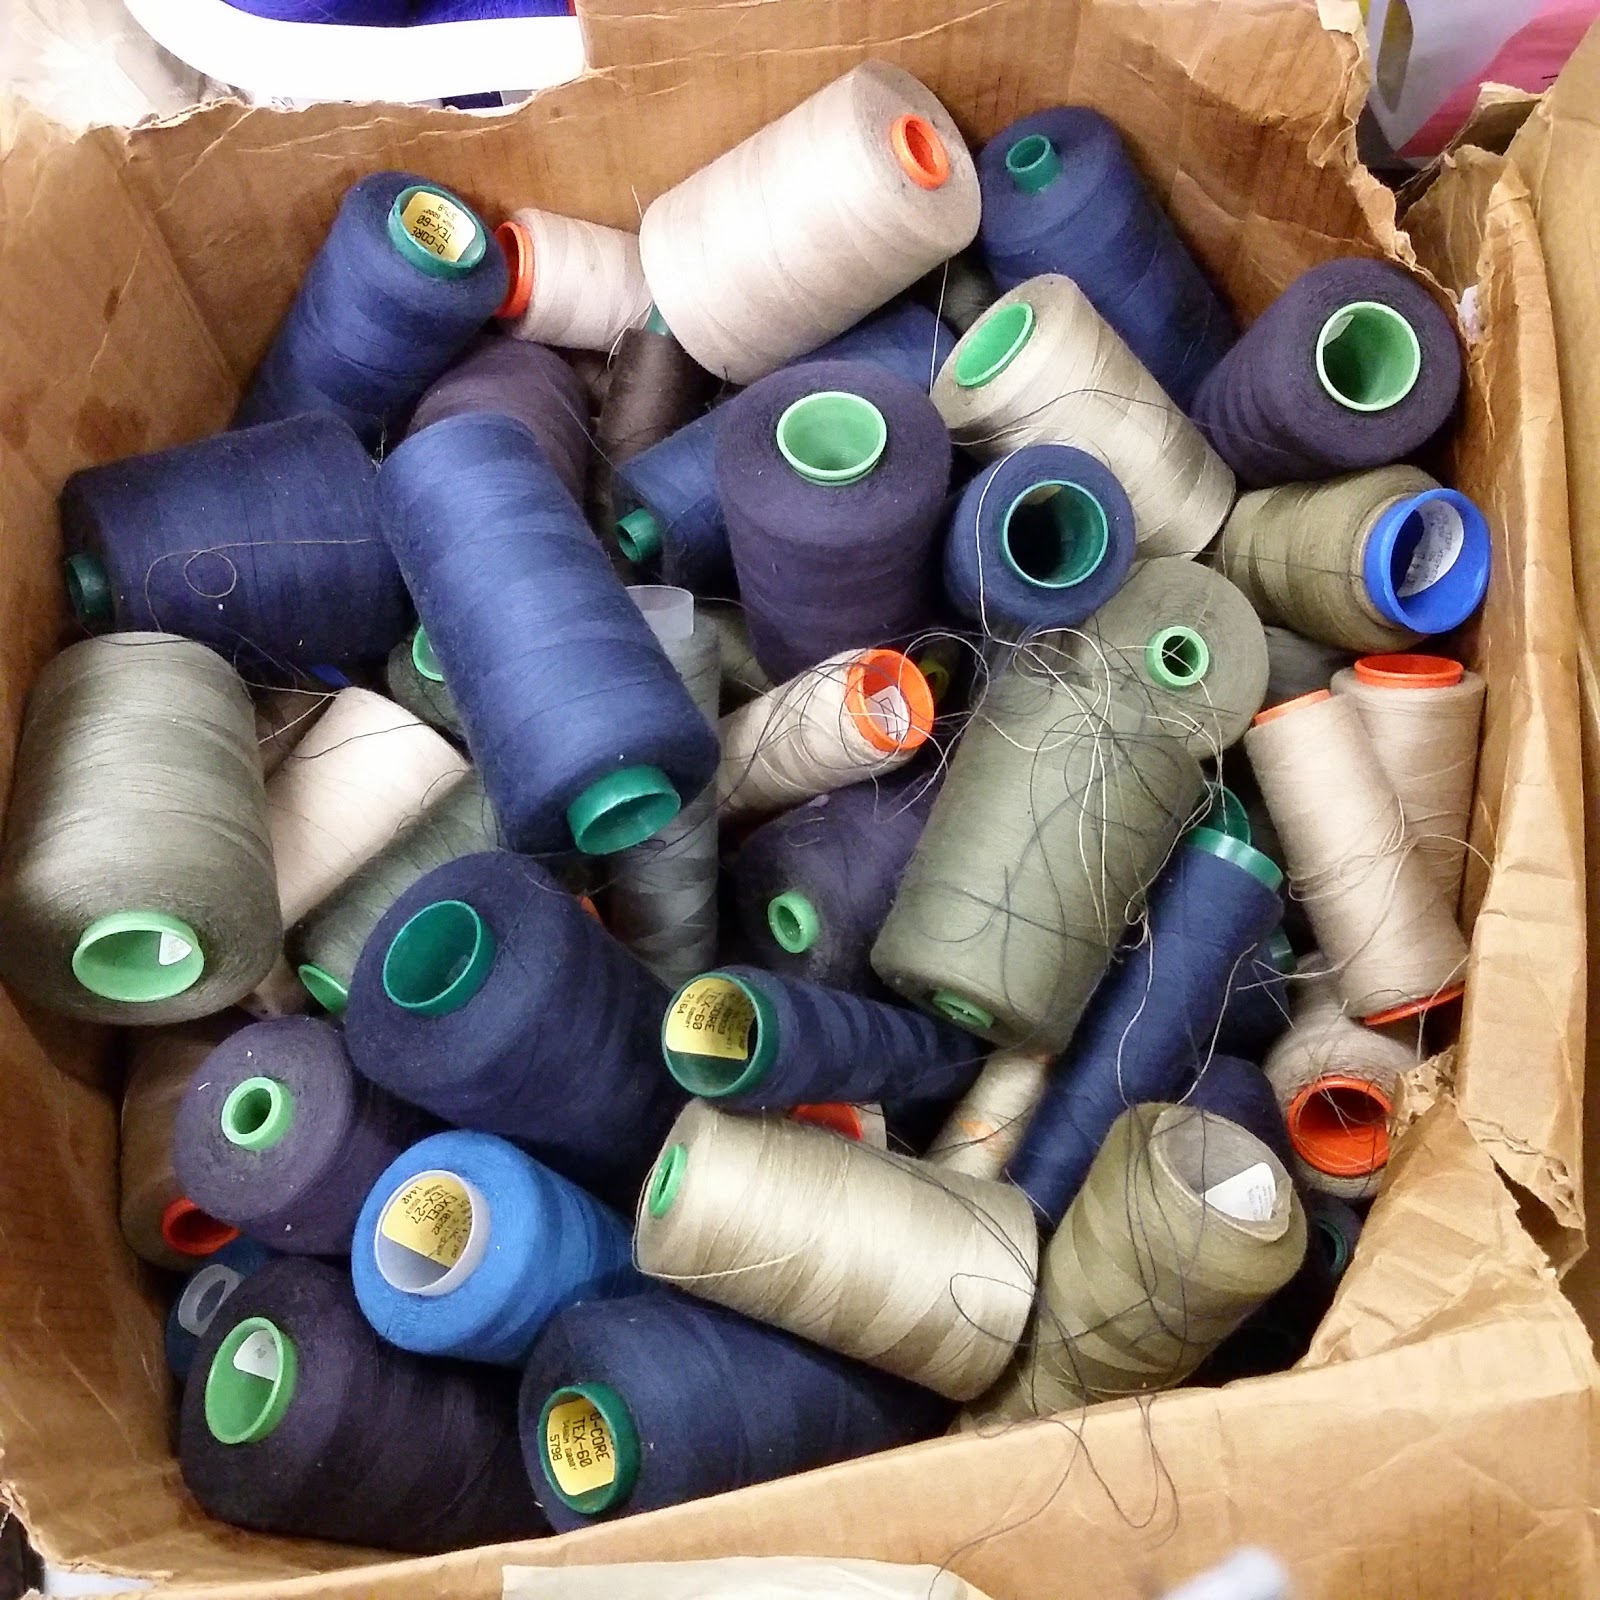
Serger thread $1 per cone. A bargain!!
Look for this elastic on the newest stock in the green bins. We've finally run out of pink!
Social, but never sour - that's us!
Lots of 80's prints to be found in the green boxes, thanks to a recent estate donation.
All rolls of knit ribbing FREE
Bundles of gorgeous wool knit $5 each
There are still a few high-quality sample books to be found $1-$5 each, as marked. Great for small projects, or piecing. And I mean high quality.
We give up! Or should I say, we give away! This sale we are concentrating on moving dead stock. We have many bolts of several types of free fabric to be had (Sorry...no photo), as well as rolls of ribbing in many bright colours, and rolls of waistband facing, all FREE. Take it away! Plus, cheap serger thread, deeply discounted bolts of fabric, bundles of lovely wool knit, and sample books. PLUS WHICH! There have been two sizable donations since the last sale, so you will be sure to find something useful.
FREE! Not just for waistbands - we challenge you to find a use for this cool stuff! Look for Carol's purse, on the wall near the cutting table, for inspiration.
Find this lovely, soft velour and high-quality wicking sportswear on the wooden racks- $5-$30/bolt
Serger thread $1 per cone. A bargain!!
Look for this elastic on the newest stock in the green bins. We've finally run out of pink!
Social, but never sour - that's us!
Lots of 80's prints to be found in the green boxes, thanks to a recent estate donation.
All rolls of knit ribbing FREE
Bundles of gorgeous wool knit $5 each
There are still a few high-quality sample books to be found $1-$5 each, as marked. Great for small projects, or piecing. And I mean high quality.
It took 8 years to dawn on me that my son was as attached to me as I was to him. I don't know what took me so long: his attachment didn't look the way I expected it to, but it has always been right there in front of me. And how. When he is sick he wants me near. Depending on how much he wants the contents, he will sip from my glass, but from no other's. When he's especially attached he'll let me clean the cheese factory under his chin, and maybe even one ear. Then there's the art: Lego dioramas featuring my favourite green alien, a drawing of my childhood dream bedroom, or - if he's feeling particularly loving - a little something-something garden gnome-ish. I do like a garden gnome.
I love the art both my children make for me: my daughter's Mother's Day portrait that perfectly captures the usual state of my mind*. The many, many Douglas Coupland-esque Lego landscapes, made with small fingers, slowly-but-surely improving fine-motor skills, great devotion and just the occasional fool-proof excuse to continue playing after having been asked to stop. "But I'm making something for you!" "Oh. Well. OK, 10 more minutes then that's absolutely it." No reply. *I worry: what if New-Mommy-Brain has become my default setting? It has been 12 years...
Family Portrait
Everyone stop talking. I need to focus!
The Inspiration
The applique on the front of this comfy, velour pullover is a replica of my son's latest love offering: an origami garden gnome head. I know: cool, right? He spent precious "tablet time" searching for just the right instructions on-line. After a failed, semi-frantic search for the appropriate-coloured and sized construction paper, necessitating an on-the-fly modification of the instructions, he settled for plain old white -- with a touch of red ink to differentiate hat from beard. The inspiration had hit, and the thing had to be made, perfect paper or no.
The replica gnome on the top is made of the left-overs from an anti-strangulation infant vest prototype (pardon?) and painted with truly old, but very usable, dye from Addie's stash. The fabric was custom-made by a manufacturer of disposable diapers for the medical-invention prototype-making-and-testing team at BCIT. (How's that for a cool job?) It's some kind of plastic-y fibre paper, and it's surprisingly durable; it can even go through the wash, though it does pill a little. The purpose of the vest was to protect hospitalized infants from strangling themselves on IV - or other - tubes and wires, by feeding these through the vest and holding them close to the baby's body. Once the prototype had been perfected, the excess fabric was donated to OSF, where most of it still awaits its next purpose in life.
Back to description of the decoration:
The origami folds were pressed with an iron, then unfolded and stitched, securing the "Gnome Instructional" to the velour, akin to a hexagon quilt pattern.
Fabric fun for the whole family!
Yeah, it's made of turquoise velour, c. 1980, cable-knit, soft and super cozy, such as what a garden gnome might wear to watch TV after a hard day standing still, hiding slugs and not blinking. Beer in hand on tubby belly, comfy chair in recline position, socks half-off. Maybe something frying in the next room, and a cat on his lap. Velour: you want to hate it, but you know you love it. What's another word for cozy? And 3 out of 4 garden gnomes can't be wrong.
Neighbour's Grandma's Velour Gardening Outfit
Velour... I have an awesome, hot pink, velour shorts-and-top set given to me by a neighbour. It had belonged to his grandma. It was her gardening outfit. I was curious... I put it on and moseyed out to do a little weeding. Stretchy! Soft! Repels most dirt. Cleans like a breeze, is out of the dryer in a jiffy. Effective against cars careening through our alley, it shouts, "Caution! Odd Neighbourhood Lady at Play!" She was right: it's the perfect gardening outfit. Bonus: when I walk into a room with it on, conversation stops. Children pat me. (And adults want to.)
Neighbour's Grandma's Abandoned Project, De-Sewn
The gnome-coloured velour was part of a donation at OSF. It was a smallish piece, left-over from some other project. Not quite enough, so I patched in a piece of c. 1970 Abandoned-Sewing-Project, set aside by the very grandma who previously owned my velour gardening outfit!
The project was a nearly-completed, lined, empire waist, A-line dress with short sleeves and bound buttonholes on back; an ambitious project for such a slippery pair of fabrics. To make it more manageable, the polyester floral print and white acetate lining were worked as one. The ragged, colourful seam allowances showing against the white lining are jarring and home-made-looking - a far cry from the groovy frock she no-doubt envisioned when she first laid out the pattern. I could see why it had been abandoned.
I could also see why it had been saved all these years: who could throw away such happy, daisy-printed fabric? Orange and pink to boot! I carried it with me for a couple of days and un-sewed it on various buses. I use it sparingly... it's one of my very fave abandoned fabrics.
The daisy print was an obvious pick for the missing portion of fabric on the sleeve of the Gnome top. However, choosing to piece the sleeve meant sewing an oft-dreaded angle seam. Pshaw! No trouble, with a few simple pointers:
Useful Sewing Tip #1: How to Sew a Decent-Looking Angle seam, without Much Cursing and With X-Large Photos
1cm seam allowances marked with soap
Use a 1cm seam allowance. It's much easier to trim the seam allowance off a commercial pattern than deal with that extra 0.5cm. Skipping this step does not pay. Don't be tempted. Trust me. Mark the seam line on both pieces with chalk or a sliver of dried-up hand soap which, unlike the chalk, makes a more accurate, slim mark, and will rinse away brilliantly with the first washing.
Corner reinforced just inside the seamline, and clipped
On the inside corner, run a row of short-ish reinforcement stitches just a hair inside the marked seam allowance, and pivoting at the exact corner. Clip just to the reinforcement stitching.
The mighty Magic Pin, keeping it all under control
From the wrong side of the fabric, stick a pin exactly beside the inside corner stitch, right on the seam line. Poke the same pin in to the "inset" layer, exactly at the outside corner, right sides together. Holding the magic pin snug against the two fabrics, arrange and pin the raw edges at both sides of the corner. The pin is the secret weapon, keeping the pivot points perfectly aligned for accurate results.
You stay right where I put you!
Keeping the magic pin through both layers at the corner, stitch the first leg toward the corner.
Angle pin toward you to keep feed dogs safe. Remove at the very last moment, revealing the Magic Hole.
Be careful not to interfere with the feed dogs. Just before reaching the corner, remove the pin, but keep your eye focused on the exact spot it left the fabric. Don't even blink. Stitch right into the hole the magic pin left in the fabric. Stop with needle down in this hole. Lift presser foot. Turn the work.
Piv-ot, rearrange bulk. Home free!
Rearrange the bulky fold of fabric out of the way, lower the presser foot, and sew the second leg of the seam.
A well-sewn angle seam is a thing of beauty and a badge of sewing honour.
Now's the time to serge the seam allowances, then do any optional edge or top-stitching. Since the stitch at the pivot occurs just a hair's width away from the clip, it's not a seam that works well in battle (as Blossom would say); a decorative stitch will add some strength.
Useful Sewing Tip #2: Testing the tension helps sewing not suck! (or: It ain't the machine, it's the operator)
The hardest thing about the sewing of this garment was all the monkeying around with the serger settings. The seams are serged with 4 threads, but the edges are finished with a narrow, 3-thread stitch. With only one serger, that means removing and replacing a needle, and having to switch settings back and forth several times while sewing. Taking a photo of each of the machine settings (tension, stitch width and length, differential feed), once perfected, can make all that switching (almost) painless.
It's worth the time to test and perfect the tension before sewing a garment. Every time. Incorrect tension looks bad, forms unstable seams, and wastes the time spent sewing, since I guarantee the finished product will be unsatisfying, and won't be worn much. If it even gets finished. The testing can, at times, take longer than the sewing, but should never be skipped. It's something to be endured. Or! with a few simple tips, it can be almost fun. Or at least not painful.
To test serger tension:
Test needle tension with a pin: firm = good!
Loopy: needle tension = too loose
Looper threads meet right at the raw edge = good!
Perfect sewing machine tension - threads all meet between the layers
Use a reasonable piece of the garment fabric. A little snippet won't do the trick. A different fabric won't do, either, since tension can vary wildly, fabric to fabric. You need enough length to sew a 20cm seam, and enough width to do this 4 or 5 times without running out of room. Sometimes 10 or 15 times!
Double the fabric if you are testing a seam. Use single layer if testing an edge finish.
The stitching has to be able to handle the maximum strain the fabric can take, so on stretchy fabric do the test on the stretchiest grain, which is usually the cross grain. Give the sample a good pull after stitching - a little more than the garment will ever be tortured with. If the stitches break, adjust the needle tension and try again. Keep trying until you get it right. Don't give up. You will be the stronger for it, and the garment will be the better.
Balanced 4-thread serging: after stitching the sample seam, take the flat head of a pin and give the two needle threads a little tug, one at a time, from the top side of the serging. If the tension is too loose, the thread will easily pull, forming a loop on top of the seam. Tighten the corresponding tension disk until it cannot be pulled loose easily.
Next, check the cut edge to make sure the looper threads meet right at the raw edges. If not, the tension disk corresponding to the "longer" thread needs to be tightened and that of the "shorter" thread needs to be loosened. Adjust only one of the tensions at a time. Test after each small adjustment, until the threads meet equally at the cut edge.
To test sewing machine tension:
Use a goodly scrap of garment fabric, about 20cm long by 20cm wide. Fold it in half on the straight grain. (Remember: all sewing is about the grain, even testing machine tension.)
Set the machine to a medium width zigzag stitch and sew a line near-ish the folded edge.
Gently separate the layers of cloth and inspect the intersection of the top and bobbin threads. They should meet right at the space between the two layers of fabric.
If the threads meet too near the bottom layer, the bobbin tension is probably too tight. Remove the bobbin and turn the little screw on the bobbin casing 1/4 turn counterclockwise to loosen. A thumbnail works well. Next, without letting the bobbin drop out of the bobbin case, gently dangle it from the tail of thread. Give a gentle, tiny, but sudden, flick (see video, left). The bobbin should drop just a little. If the tail lengthens a whole bunch, the bobbin tension is too loose. If it doesn't budge, it is too tight. Adjust the screw accordingly, insert the bobbin into the machine, and do another zigzag test.
If the threads meet at the top layer, either the bobbin tension is too loose, or the machine tension is too tight, or both. Do the bobbin case flick trick. If the bobbin tension seems OK, loosen the machine tension a titch, and do the zigzag test again.
Bobbin tension is most often the main culprit with really bad machine tension.
Note to the small army of garden gnomes in my house, folded, drawn or otherwise crafted: Thank you. I got your message.